Saturday, April 30, 2011

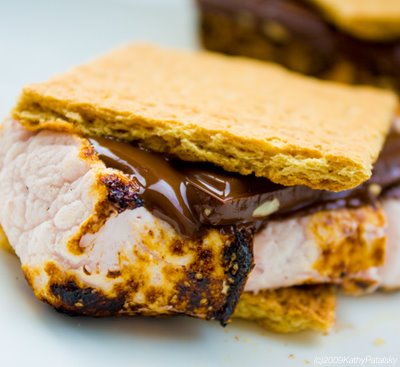
Ode to the S'more

I am considering doing a S'more Bar 
for party, so I started doing a little research. 
I was surprised by what I found... 
there are so many s'more-ish options out there.


The "Tradtional"
Graham + Chocolate + Marshmallow
A classic... the "little black dress" of s'mores!

The Glamorous & Modern
"S'mores Bar"


"The Rustic" 
S'mores Bar


And finally...
"S'mores To-Go"
what a cute party favor!

To create your own 
S'mores Bar 
might I suggest the following options
Chocolate 

Milk, Dark, White, Milk with Almonds, Cookies & Cream, Reese's Peanut Buttercups, Nutella

Grahams
Regular Honey, Cinnamon, Chocolate

Marshmallows 
Traditional white, Strawberry, Chocolate, Swirl, Spreadable Marshmallow "Fluff"

Extra's 
S'mores Pop Tarts, S'mores Goldfish


General Supplies

Fire Pit 
Or some sort of metal planter to hold the lava rock & Sterno in

Sternos 
The kind used under chafing dishes. Make sure you get the ones with the wick not the gel and make sure they can burn for 3+ hours, some only burn for 2 hours 

Lava Rocks 
Available at any home & garden store like Home Depot or Lowe's

Decorative Serving Platters & Jars 
or anything you wish to hold the marshmallows, chocolate bars and graham crackers

Skewers/Sticks 
To cook your marshmallows on


If you don't have the time or energy to 
create a S'mores Bar, but you still want 
that delicious taste? 
Try this yummy recipe...


Ingredients


  • 3 cups graham cracker crumbs
  • 3/4 cup butter or margarine, melted
  • 1/3 cup sugar
  • 3 cups miniature marshmallows
  • 2 cups semisweet chocolate chips

    • Directions


    1. Combine the crumbs, butter and sugar; press half into a greased 13-in. x 9-in. x 2-in. baking pan. Sprinkle with marshmallows and chocolate chips. Top with remaining crumb mixture; press firmly. Bake at 375 degrees F for 10 minutes. Remove from the oven and immediately press top firmly with spatula. Cool completely. Cut into bars. Yum


And last but not least...
I know Easter is over, but I know 
you have some left over peeps!
So enjoy this suggestion from Steamy Kitchen!

OK, it's official... 
I am all s'mored out!

Friday, April 29, 2011

Congratulations Wills & Kate

Raise your glass,
to the adorable couple!


We are looking forward to celebrating the nuptials at our "Royal Wedding Brunch" tomorrow.

Pictures of this 
fabulous fete 
to follow...
CHEERS!

Thursday, April 28, 2011

Elegant Butterfly Party

In my continued search for 
"that special" birthday party theme...
I stumbled across the simplest, sweetest & perfectly precious little butterfly party
from the gals over at


This really proves the point that 
less, really is more!

To get the full scoop on this party, click on
Have fun... I sure did!

Wednesday, April 27, 2011

Chocolate Croissants!

What a delicious & easy treat!

This was posted on the
Facebook Page & I just had share... 
It's so easy, why didn't I think of it?!


is an awesome little "must see" Etsy shop,
definitely worth further exploration!

These might be yummy as a special weekend
morning breakfast treat...

Have a delicious day!


Tuesday, April 26, 2011

Teacher Appreciation!

Teacher Appreciate Week 
is coming up next week May 2nd-6th...
So when I saw this idea 
(and free offering) 
from

I was really excited!

Click HERE
to get your FREE 
Teacher Appreciation Subway Art.

Thank you eighteen25
you made my day!!!

Tushie Cookies!

Check out these stinkin' cute 
"Tushie Cookie" party favors by
(great name, huh?!)
The truth is ~
We've all seen a ton of cookie favors, but I have to say, I think Pink Martini's & Pearls has a special eye for fabulousness! 
Their creations are TDF... 
I highly recommend that you check 'em out! 

I absolutely love these darling little "tushies"! These are not only delightful wedding shower favors, but I think they would be darling "Girls Night Out" favors as well!

And not to worry...
"full bottom" panties are available 
for you modest types!

The End!

Monday, April 25, 2011

Tubs of Fun!

Buckets & Tubs...
Tubs & Buckets!!!

Meet


These Tubs & Buckets 
are perfect items for your "Party Panty"
and they make great gifts too!

What's a Party Pantry You Ask? 
You know, that stash of essential items that every 
good hostess with the mostess must have! 
Things like dinner whites, simple good linens, 
milk bottles & wine glasses.

Party Tubs & Buckets are essential!
They hold ice & drinks...
They are centerpieces...
 They are the handy holder of utensils...
They gather up this & display that...
All the while making us smile!

Has every shape, pattern, 
size & style + they personalize!

Now That's Tubs of Fun!!!

Sunday, April 24, 2011

Easter Greetings!

Happy Easter Everyone !
Floral arrangement 

Cheers to a wonderful 
Easter Sunday!

Saturday, April 23, 2011

Appetizers!

Our family will be celebrating a (belated) Easter & Mother's Day Weekend together. Always a wonderful opportunity to get everyone together... that's 16 adults, 4 kids & 3 dogs! 
It should be a blast!

Since we will be out by the pool most of the time, we decided to bring oodles of appetizers for a perpetual noshing, while we lay around & play with the kids & have a cocktail or two!

In my search for some new recipes 
(to shake things up a bit) 
I came across a few at 
Yummy Mummy ~ a tasty little blog 
that I encourage you to check out... 

Here's what I found!


Serves 4-6

  • 1 ball pizza dough
  • 3/4 cup garlic-and-herb cheese spread (such as Alouette), divided
  • 3/4 cup finely grated Parmesan cheese, divided
  • 3 tablespoons chopped fresh Italian parsley, divided
  • 1 small red onion
  • 1 7- to 8-inch-long zucchini (yellow or green), cut crosswise into 1/8-inch-thick rounds, divided
  • Olive oil
Preheat oven to 400°F. Line baking sheet with parchment paper and lightly flour it. Roll dough into a square on the parchment. Spread half of herb cheese over 1 long half of dough, leaving 1/2-inch plain border. Sprinkle with half of Parmesan and 2 tablespoons parsley. Using parchment as aid, fold plain half of dough over filled half (do not seal edges). Spread remaining herb cheese over top; sprinkle with remaining Parmesan. Remove enough outer layers of onion to yield 2-inch-diameter core; cut into 1/8-inch-thick rounds. Arrange 1 row of zucchini down 1 long side of dough. Arrange onion rounds in row alongside zucchini. Arrange 1 more row of zucchini alongside onion. Brush vegetables with oil; sprinkle with salt and pepper. Bake bread until puffed and deep brown at edges, about 24 minutes. Sprinkle with 1 tablespoon parsley. Doesn't this look & sound delicious?


1 package Raincoast Crisps*
2 pears, quartered and sliced
Humboldt Fog cheese, sliced 
Honey 

Assemble pear and cheese slices atop the crisps. 
Drizzle with honey. In a word ~Yum! 
*Raincoast Crisps by Lesley Stowe Found at Whole Foods. 


Pack the tins well to hold together. To help with the binding I added buttered breadcrumbs on the top. Also, the next time I make these I will be doubling the cheese it calls for, I think they could have been cheesier. 

1/2 pound elbow macaroni
1 1/2 tablespoons unsalted butter, plus more for brushing
1/4 cup freshly grated Parmigiano-Reggiano cheese
2 tablespoons all-purpose flour
3/4 cup milk
4 ounces cheddar cheese, shredded (1 packed cup)
4 ounces deli-sliced American cheese, chopped
1 large egg yolk
1/4 teaspoon smoked Spanish paprika

Preheat the oven to 425°. In a large saucepan of boiling salted water, cook the macaroni until al dente, about 5 minutes. Drain, shaking off the excess water.

Brush four 12-cup, nonstick mini muffin tins with butter. Sprinkle with 2 tablespoons of the Parmigiano; tap out the excess.

In a large saucepan, melt the 1 1/2 tablespoons of butter. Whisk in the flour over moderate heat for 2 minutes. Whisk in the milk and cook, whisking, until boiling, about 5 minutes. Add the cheddar and American cheeses and whisk until melted. Off the heat, whisk in the egg yolk and paprika. Fold in the macaroni.

Spoon slightly rounded tablespoons of the macaroni into the prepared muffin cups, packing them gently. Sprinkle the remaining 2 tablespoons of Parmigiano on top.

Bake the mini macs in the upper and middle thirds of the oven for about 10 minutes, until golden and sizzling. Let cool for 5 min utes. Using a small spoon, carefully loosen the mini macs, transfer to a platter and serve.

I'll let you know how it goes!
Related Posts Plugin for WordPress, Blogger...
 

BLOG DESIGN BY DESIGNER BLOGS